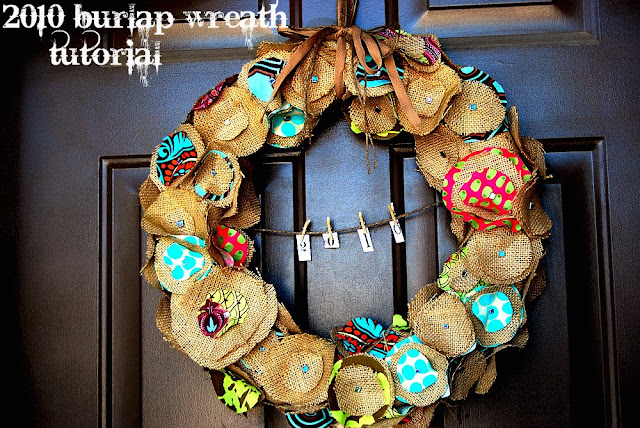
Thursday, March 31, 2011

Shredded Pork for a Crowd


A week ago, Ree from The Pioneer Woman Cooks posted a recipe for  Spicy Dr. Pepper Shredded Pork. I was hooked instantly.  It looked delicious.  Did you notice how I titled this post "Shredded Pork for a Crowd" though?  Well, I was so smitten with this recipe that I had to make it ASAP.  I held out for a few days and then I made it for the four of us.  I have LOTS leftover.  Like another eight dinners maybe.  Good thing we loved it!  I think it will freeze just fine for those lazy cooking days I have all the time every so often.

This recipe is so easy.  Just dump your ingredients in your pot, stick it in the oven and then come back six hours to take it out of the oven.   No searing.  No excessive chopping.  No hard to find ingredients.  There's really only a handful of ingredients in making the meat.

This would be a great BBQ recipe or for graduation parties that are coming up.   The meat can be made the day before and then just reheated.  And did I mention it serves a crowd? ;)

So, I started out with this:


Yep.  6.5 pounds of meat for two adults and two little boys.

Added a large onion to the bottom of the dish:

And added the seasoned pork:


I really need a large dutch oven.  Once I added the liquid, this was almost overflowing!


Added chipotle peppers to the top:


 I just them on there and left them like that.

Then I added 24oz ( or a few ounces shy since my pot was too full) of Dr. Pepper and a TBS of brown sugar.  I didn't get a pic here because I was worried about how full my pot was and I just wanted to get it in the oven.

The recipe says to cook it for 6 hours at 300 degrees Fahrenheit or until it is falling apart tender, turning it a few times during cooking. 

After maybe 5 hours, mine was like this:


Definitely falling apart!

I shredded my pork and then added it back to the liquid:


See where it overflowed while cooking?  Good thing I put a pan under it to catch the drips!

The Pioneer Woman had a great tip to cut down on the fat.  After making this dish, if you're making it ahead, keep the meat and liquid separate and refrigerate them both.  The saturated fat will harden and you can scoop it off the top of the liquid the next day.  I do this for soups I make and it works great.

To serve, I had tomato, avocado, lettuce, lime and cheese:


 Like my fancy dishes?  I knew you would!

I made a mistake of buying corn tortillas the first day.  I don't really care for the rubbery texture of store bought corn tortillas, so it ruined it a little for me.  The second day, I bought flour tortillas and it was 100% better.  Wow!  So good!  They are slightly spicy, but my boys ate them, so it wasn't horribly so.  Ree even has a recipe for homemade flour tortillas on her blog and I am going to try them someday!


Here is the recipe, but I strongly recommend you check out Ree's post about making it.  She has some great tips and her pictures are a million times better than mine.

Spicy Dr. Pepper Shredded Pork

Ingredients

  • 1 whole Large Onion
  • 1 whole Pork Shoulder ("pork Butt") - 5 To 7 Pounds
  • Salt And Freshly Ground Black Pepper
  • 1 can (11 Ounce) Chipotle Peppers In Adobo Sauce
  • 2 cans Dr. Pepper
  • 2 Tablespoons Brown Sugar

Preparation Instructions

Preheat oven to 300 degrees.
Peel the onion and cut it into wedges. Lay them in the bottom of a large dutch oven.
Generously salt and pepper the pork roast, then set it on top of the onions in the pan.
Pour the can of chipotle peppers over the pork (include the sauce.) Pour in both cans of Dr Pepper. Add brown sugar to the juice and stir in.
Place lid tightly on pot, then set pot in the oven. Cook for at least six hours, turning roast two or three times during the cooking process. Check meat after six hours; it should be absolutely falling apart (use two forks to test.) If it’s not falling apart, return to the oven for another hour.
Remove meat from pot and place on a cutting board or other work surface. Use two forks to shred meat, discarding large pieces of fat. Strain as much of the fat off the top of the cooking liquid as you can and discard it. Return the shredded meat to the cooking liquid, and keep warm until ready to serve. (You can also refrigerate the meat and liquid separately, then remove hardened fat once it’s cold. Then heat up the liquid on the stove top and return the meat to the liquid to warm up.
Serve on warm flour tortillas. Top with shredded lettuce, diced tomatoes, grated cheese, avocado slices, salsa, and whatever else you’d like.


 Have a wonderful day! 

Monday, March 28, 2011

Laundry Room Progress

The laundry room is coming along!  We spent most of the weekend working on it and I am so in love with the progress we made so far.  How weird would it be for me to say that the laundry room may end up being my favorite room in the house?  And I'm really not a big fan of doing laundry.  Is anyone?

I was planning on waiting until it was finished to post any more pictures of it, but then I realized that it may WEEKS before anyone heard from me.  Cue crickets chirping here....

So I am going to share the progress we've made so far!

As of this afternoon, this is where we are:


And to remind you, this is what we started with:


 I still have this side of the room to deal with, where 80% of the overall work to be done in the room is:


For now, though, let's just look at this side of the room:


Have a great Monday!

Tuesday, March 22, 2011

Burlap Spring Wreath

Since we officially had the first day of Spring a few days ago, I thought I would attempt to do something crafty and make a Spring wreath for my front door.  While I sometimes get great ideas for crafts (or see great ideas for crafts that I want to copy may be more like it in this case), the execution of creating those things sometimes falls short for me. It requires patience.  And time.  I am low on both those things at times.  That said, this project turned out pretty well, if I do say so myself! Really, it didn't take much time at all. 

Of course, true to form, it was a bit of an adventure like most of my projects around here are!

So, first I needed a wreath, right?  It was the only thing  didn't have on hand.  One requirement for this project was that I use what I had on hand and didn't run out to buy everything.  So I headed to Michaels and bought this:


Sorry for the dark pics, it was really cloudy here yesterday.

I had this burlap on hand and knew I wanted to use it for this wreath:

The original plan was to use a colorful burlapish (real word?  probably not) ribbon I had to intertwine with this and call it a day, but once I got it out, I realized the colors screamed "Fall".  Literally.  I thought it looked a little "Fallish" and then looked at the name on the spool and it said "Autumn Harvest" or something, so yup, back to the drawing board.  Or Google, if you want to be technical.  

A little Googling for burlap wreaths found this:


I loved it and I had what I needed on hand for it.  Perfect!

The above link will give you a great tutorial on how to make this wreath.  I just took my burlap and wrapped it around my wreath so it looked like this:


I hot glued the ends to keep it in place.  Then I just cut random size circles out of my burlap from some fabric I had on hand.  The burlap I had was really loosely woven, so it was hard to get a perfect circle shape, but that didn't really matter.  The fabric I had on hand worked, but in a perfect world, I would have had some cuter stuff on hand.  This project was about using what I had though, so its ok!

This is one of the fabrics I had on hand.  I originally used this fabric for curtains in my son's nursery:

I also had this beaded garland on hand from when I bought it at Pier One 8 years ago.  A store closed and they were clearancing all their inventory.  I went a little crazy when things got to 75 and 90%off and bought two of these.  I've never used them, so it probably wasn't such a great deal after all!


I just pulled some beads off and used them for the centers of my flowers.  There are so many on there, you can't even tell I touched it.

Then I just stacked the random sized circles of burlap and fabric, hot glued them together and then hot glued the beads on so it looked like this:


I was done with this part and glueing them all in place on the actual wreath when it was time for my regularly (un)scheduled mishap to occur.  I am about 90% finished when I hear my napping two year old crying.  I run up to his room and he greets me with, "I need to go to the hospital", which he sometimes randomly says ever since we visited my stepfather  one time at a hospital.  The place really made an impression on him.  I think he's just trying to get out of his nap, lay him back down and return to my wreath.  A few minutes later, he's crying again. I go up and there it is...My poor baby is sick.  I'll spare you the details, but let's just say we revisited lunch up there.

After a long break and some cleaning, I managed to get a few minutes to somewhat frantically finish the wreath in between his little stomach bouts.  I would have just put it away and finished it another day, but I was SO CLOSE to being done that I couldn't.

So, without further ado, here it is:


Notice my dog looking out on the left there...


This little bird was .01!  (Ok, so I bought two things)


Project complete!


LINKING UP HERE:


Visit thecsiproject.com


Funky Junk's Saturday Nite Special


Tip Junkie handmade projects

Today's Creative Blog


Friday, March 18, 2011

Alright, The Plan...

Happy Friday!!  What a quick week this was!

I've made a little progress with the laundry room , but its not going quite as fast as I had hoped.  This weekend is not going to be super productive either since we have our nephew's hockey championship game Saturday and a visit from my in laws on Sunday.  Once we get rolling though, it shouldn't be long!

Last time, I threw out two colors I was trying to decide between:

BM Buxton Blue (right) and BM Wedgewood Gray (left):


I really love the Buxton Blue.  Its such a pretty color.  When I put the two next to BM Wickham Gray though, the Wedgewood seemed to go better.  So I picked that one and I think I will save Buxton Blue for my son's big boy room or for our master bath.  We shall see.

Since then I have started to paint, but have only gotten this far:


This was it before I painted the molding:


So, in other words, not very far!  I was finished with most of the trim, but then decided to paint the window.  I have one more coat to do there and then I am done with that part and can finish the blue.

Here are a few pictures to show you the plan for the rest of the room:


There are three things in this picture from Traci's blog Beneath My Heart that will show up in my laundry room.  Can you guess what they are?


Farmhouse Sink


New countertop


See anything in common with these two following pics?
(Source unknown.  If these are yours, please let me know so I can credit you!)


Open shelving:


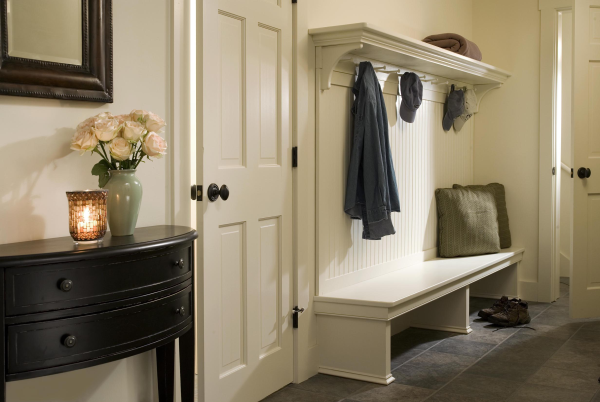
Some mudroom type storage:

http://thegatheringplacedesign.blogspot.com/
Love this!  Ours will be much smaller scale though...
Maybe these are more realistic:
http://blog.connorbuilding.com


 Source Unknown

How about new hardware?  I found these at Target for 75% off!  I like that they are a little oil rubbed bronze and a little silver.  It was exactly what I was looking for.  The sticker says $13.98. but they were really $6.98!  This was just today too, so check your hardware section at Target.  Mine also had Command fasteners, hooks,  and lots of stationary and party supplies at 75% off.


And the part I am most excited about:


My $40 garage sale find last year that has been patiently waiting for our date with a paintbrush.


So there you have it!  A little sneak peek to what I have in mind for my laundry room. 
OK, back to work now!