Showing posts with label Laundry room. Show all posts

Tuesday, January 8, 2013

Returning with updates!

Hello?? Anybody still out there?

It's been so long since I've written a post on here. I'm not sure I remember even how to do it! I apologize for the long delay in case there is anyone who was following some of my projects and wondering how they've turned out.

It's been since May 2011 that I've posted. A lot has happened since then...

Home wise, I'm 90% finished with my laundry room:


(You can see what we started with, in all its sponge painted, orangey oak glory, HERE)

And 90% finished with our office:


It's always the last 10% that gets me! The finishing touches. The fun stuff (usually). I don't know why decorating ADD sets in and I stall.

We added this beauty to our family four months ago:


She is our little ray of sunshine. Our cherry on top. I could probably think of 100 more similar ways to describe her, but you get the idea. We are all so in love with her. Our boys, 4 and 6 yrs, adore her and take their role of big brother very seriously. They revel in her everyday and it warms my heart to see them love her so deeply and openly. The feeling is definitely mutual too. She is always ready with a smile whenever she looks at them.


I just wanted to quickly update with a few photos. I'll be back in a few days with more pictures and details on my laundry room and office. I'm looking forward to sharing soon!


Tuesday, May 17, 2011

Crawling Along in the Laundry Room

Hello all! 

I am sorry for the lack of posts lately.  I have been busy working outdoors and it has taken me away from the laundry room a bit.   We have made some progress though. 

The ceiling is complete (well, minus some crown molding, but that is painted and ready to go up too).


My Habitat Restore pendant is painted and up as well and I love it!


It started out like this:


Also, my ironing board cabinet is painted.  I am just waiting on some fabric to cover the ironing board.


Remember, it looked this this before:


This cabinet is important because I am using it as a test to see if I like it enough to paint my kitchen cabinets the same color.  I also wanted to see how difficult the process is, although I know one cabinets is nothing compared to the thirty or so in my kitchen.  I do like it.  A lot.  Eeeek!

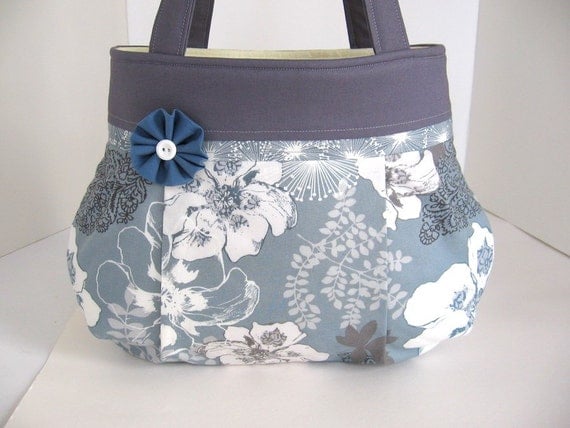
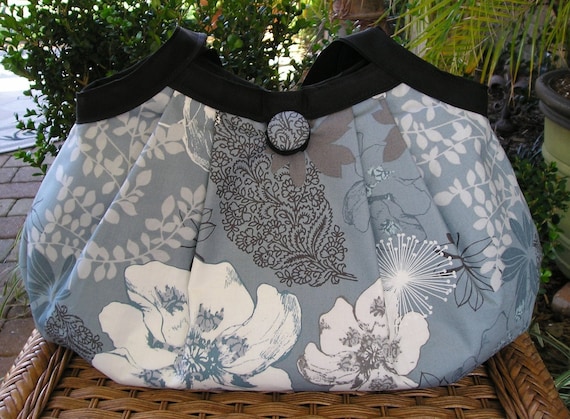
Finally, I think I found the fabric for the laundry room, since I sold the other fabric I talked about here

Here is a sneak peak:


From doing a little research online, I have found the blue is actually a little more blue, IRL. 
Here are some examples from Etsy:


Its crazy how different they look! 

Have a great day!  Next time, I'll be back to show you my garden!  I love decorating, but I am just as passionate about gardening and I can't wait to show you what I have!


Tuesday, April 26, 2011

My Fabric Dilemma

Good morning!

I am moving forward with the laundry room and looking at fabric.  I need fabric for my window, to cover my ironing board and to line the back of my hutch.  The colors I'm looking for are blue, grey and green.  I'm flexible on the green and if I found the right fabric, I can work with it.

So, I did find some fabric I love.  I saw Amy Butler's Daisy Chain collection and loved it right away. 

Here are the three I liked:

Sweet Jasmine-Grey

Happy Stripe- Grey


Dandelion Field- Silver


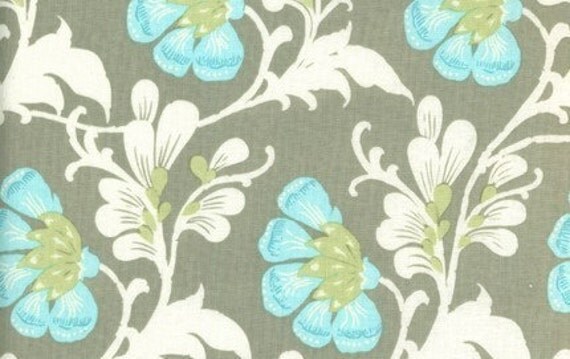
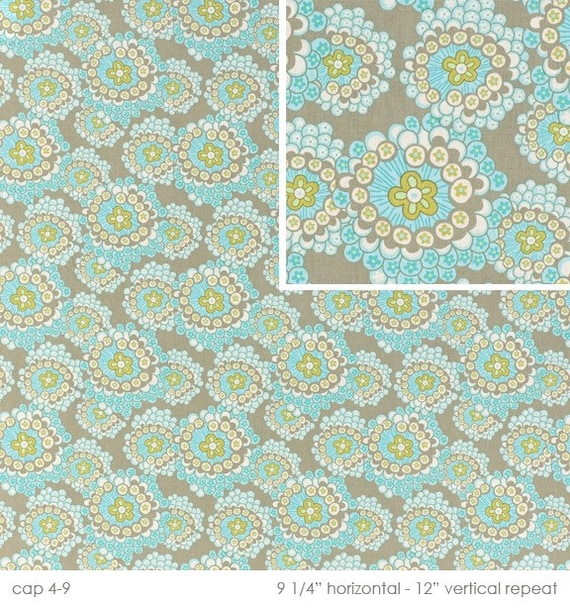
 I ordered all three and received them last week.  Do you see the words in the description that follow all three?  Grey and Silver?  They don't mean a thing when it comes to describing what the fabric actually looks like!  There's no grey.  No silver.  Its brown!  Or tan.  Or on a really good day with the right lighting, its taupe.  My husband even said it was green.  No one that I showed it to said grey though.  Looking online, the vast majority of the images show it as being grey, but there were a few that showed its true color.
Here is a picture I just took this morning:


  So, sadly, its not going to work and I am back to square one with the fabric.

Which brings me to the true dilemma.  The other stuff not working out isn't a big deal because I can sell it on ebay.  Its annoying, but I understand things like this happen when ordering online.  The problem is that I can't find anything I like!  I want grey and blue and maybe green or yellow and I can't find anything.  Everything I see has brown instead of grey in it. 

So, share with me, if you can, what is your favorite source online for fabric?  Have you seen any fabric like what I described?  I saw this at Marshall's last night after looking without success at every single style of fabric for the third time at JoAnn's and had to laugh.  It kind of spoke to me:


That's my newest challenge for today!  What are you working on?  Is it going smoothly?


Monday, April 25, 2011

Leftover Ham? No Problem!


Happy Monday!

I hope everyone had a wonderful weekend and Easter Sunday.  We had a great day here.  Lots of good food, fun with family and even some decent weather for a change!  (those of you who live in warm climates may debate that last one since it was only in the 50s and partly sunny, but we've had a brutal Spring so far, so I'll take it)

I thought I'd share an easy way to use leftover ham.  This year, we had pork for Easter dinner, but I had bought a ham last week and made this dish with the leftovers.  My boys loved it, which is always a bonus.  They are normally good eaters, but need to be reminded constantly during dinner to eat, so when I find a meal that they eat without any prodding, its a keeper!


Its inspired from this recipe, but I modified it to get this:

Ham and Potatoes Au Gratin 

Ingredients

  • 4 cups potatoes, peeled and cubed
  • 3 cups diced cooked ham
  • 15 oz can corn or frozen corn
  • 3 tablespoons minced onion
  • 2/3 cup butter or margarine
  • 6 tablespoons all-purpose flour
  • 3 cups milk
  • 2 cups shredded Cheddar cheese
  • 1 TBS dried parsley
  • 1/2 tsp paprika
  • small pinch cayenne
  • 1 1/2 teaspoons kosher salt
  • generous dash  pepper
  • Chopped fresh parsley

Directions

  1. Combine potatoes, ham, corn and onion in a greased 9 x 13 casserole; set aside. In a saucepan, melt butter over medium heat; stir in flour until smooth. Gradually add milk; stirring constantly until mixture thickens and bubbles. Add cheese, parsley, paprika, cayenne, salt and pepper; stir until the cheese melts. Pour over potato mixture and stir gently to mix. Bake at 350 degrees F for 35-40 minutes or until bubbly and slightly browned on top.

 Like I said, these guys loved it:


Plus it was easy.  It doesn't get much better than that!

On the remodeling front, I have to admit that my little mishap with the hutch sucked up a lot of my energy and enthusiasm last week.  I am happy to say that the doors no longer look like this:


and now look like this:


(Ignore the orange oak cabinets...their day is coming)


It really wasn't that difficult to fix after all.  It just took a lot of detailed sanding, but the repainting was a breeze.  I am planning on finishing it this week with a little light distressing and then some finishing wax.

Thanks for your patience as I crawl along!  Have a wonderful week! 


Tuesday, April 19, 2011

The Big Fail


Alternately known as, "I Wanted to Give Up"
or
"Is This a Joke?"
or
"I know I'm Being Overly Dramatic, but I Don't Care"


It all started out just fine.  I finished painting the hutch that is going to go up in the laundry room. 


I still have to wax it, but the sanding, priming and painting is done.  The plan is to put the doors on the end and leave the middle as open shelving.

Which brings me to the doors.  The doors.
I sanded them, sprayed the wire front, taped around it, primed, sanded, painted, sanded and one and on and now it looks like this:


Insert scary music here:


Once I removed the tape that was protecting the wire, it started coming off in CHUNKS!


Even though I sanded, I am guessing I did not sand the inset area well enough.  Even now, as I sand it again, it is hard to get a rough surface there.  The paint on the rest of the door, so far, seems just fine. 

Now, I need to fix this fiasco.  We are going to remove the wire front, which I wish I would have done first, but I was afraid it was  going to be hard to staple it back in place.  My husband has informed me that it would be really easy to do that (Thanks for mentioning that NOW, Dear).

Speaking of the wire front, the tape pulled some of the paint off:


It just gets better and better!

Ok, I am almost done with all the belly aching and self pity.  It could be worse, I know.  I just thought I was following all the steps so carefully and really didn't foresee this hiccup.  It will be better.

For now, though, I just want it D.O.N.E.

Hope your projects are going better than mine, but if not, please feel free to commiserate with me and tell me all about it!


Tuesday, April 12, 2011

Getting Crafty


Good morning everyone! 

I took a little break this past weekend from working on the laundry room and worked on a baby shower gift for a friend.  I always struggle with what to give someone who is having their second child and the sex is the same as the older sibling.  They already have all the big stuff and if the seasons match, clothes aren't that helpful either.  Usually I go the diaper route, with maybe an outfit as well thrown in there.  For this friend, though, she has been wisely stocking up on Amazon's awesome diaper sales and really didn't need those.

So, I decided to make some changing pads as part of the gift:


Don't you love the fabric?  Who says you can't be stylish while changing a diaper?

When my boys were little, my mom made me something kind of similar and I used them for changing diapers on my family room floor.  There was no way I was going to go upstairs to the changing table everytime I changed a diaper...I had two in diapers for a while and that just wouldn't have worked for me.  I also kept them in my diaper bag and  also used them as a mattress or sheet protector.  They got so much use around here!

I am not a skilled sewer at ALL, but these were so easy and a great project for someone just learning to sew.  I bought some soft flannel fabric from Joann's in patterns I liked and had some leftover blackout liner that I used as the waterproof pad.  The material really seems to repel water, so why not? 

Then, its just a matter of sewing all four sides together with the nice side facing in, leaving about a 6" opening.  Then I pulled the fabric through the opening so the nice side was facing up and sewed the opening shut with my machine.

I also took a little break to go through the cabinet where keep our medications and some first aid supplies.  It was so full that something fell out everytime I went in for something. 

Its started like this:


Looked like this during:


How did all this fit in that small cabinet?!  Expired meds are on the left.

And looked like this when I was finished:


Much better!  I love a little order!


Wish I could say the same for my basement.  The room where I am painting my cabinets and hutch looks like this:


And the laundry room still hasn't changed much and looks like this:


Lots of big changes coming up though!  The ceiling will be up and finished soon and the hutch will be completed in a few days. 


And finally, one of my all time favorite blogs, Just a Girl, featured my license plate mirror on her blog! I think my heart skipped a beat or two when I saw it. 


I think I will ride that high all week, thank you very much!

OK, I will be back next time with some laundry room PROGRESS!  Have a wonderful week!