Today I want to tell you how I updated our oak vanity that I showed you when I posted about our completed bath remodel here.
Here is the finished cabinet:

And here is what it started out as:


Staining the oak was incredibly easy. Like I think my four year old could have done it easy. Seriously.
This is the stain I used:

Um, next time I'll remember to take a picture before I make a mess of the can. For those of you who don't have x-ray vision to see through the stain blotches, it is General Finishes Gel Stain in Java . It is an oil based gel stain. Gel stains are foolproof, IMO.
After doing a lot of research, I settled on the General Finishes brand because I read and saw nothing but positive things about it. Some of the other products, like Minwax (especially the polyshades) , had some spotty reviews. The price of the General Finishes gel stain is similar to the other products with the main drawback being that you have to go to a woodworking store like Woodcraft or Rockler to find it. The General Finishes website has a store locator feature to help you find its products.
To stain the cabinet, I first removed the doors. Then I wiped everything down with mineral spirits. After that, I lightly sanded the cabinet and doors until I didn't see any glossy surfaces. I used 220 grit paper and I was thorough, but didn't go crazy with the sanding.
After I sanded everything, I wiped everything again with mineral spirits. Then I used tact cloth to remove any remaining dust on the surface. If you aren't familiar with tact cloth, its just a sticky cloth that picks up any dust on the surface of what you're working on. It looks like this:

To apply the stain, I put on a pair of gloves and used a foam brush.
 |
| (The brush I used was too big for my can, which is why I made a mess out of it) To apply, I just got some stain on my brush and painted it on with the grain of the wood. Once I had the entire surface coated, I used an old t-shirt to wipe it off. I just wiped with the grain of the wood and wiped it LEVEL, not completely off. **One IMPORTANT thing to note is that this product is flammable while the cloths are still wet, so store them in water after you use them or be careful where you leave them lying** This is what it looked like after one coat:  To get the color to be completely even, I did three coats total. Two may have been enough, but I wanted to be safe. I followed the instructions on the can and waited six hours between coats (because its oil based, it takes longer to dry). In between coats, I very lightly sanded with super fine sandpaper (400 grit). Here it is after three coats, but before the poly:   Again, this is what it started out as:  To protect the surface, I did one coat of this: 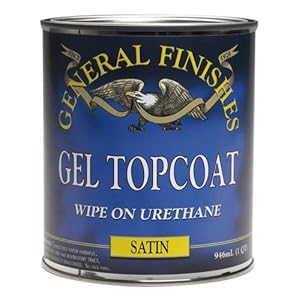 After I did the front and doors of the cabinet, there was still this:  Well, that kind of ruins the look, don't ya think? So the hubs went out and bought some laminate board and I stained it following the same procedure I described above, after my husband cut it to fit. There were some knot holes in it that I filled with wood filler and then sanded:  This board absorbed the gel stain way more than the cabinet:   and attached it to the vanity. I have no idea how much you're supposed to put on, but this is what I did. We ended up using finishing nails to attach it too. Now 99% of you are smarter than me and won't do this, but for the other 1%, this is for you... Don't do this when your husband is at work and you have two kids at home. Or at least be more prepared than me. I put the Liquid Nails on and then realized that I had nothing to hold the board in place while it dried. I didn't know where my husband kept his wood clamps and everytime I let go of it, it popped off. So I had my son bring me my phone and I called my husband who luckily was on his way home to rescue me with some wood clamps. I guess I could have pulled it off and wiped the Liquid Nails off, but I was worried it would be a big mess and ruin things. So while I held it in place, my two and four year old decided to pour themselves some milk. Only they didn't grab the regular milk, they grabbed the BUTTERMILK and dropped it. There was thick buttermilk all over the kitchen floor when my husband walked in, Not a little. Picture a whole half gallon. And I had just cleaned and polished my floor the day before. See how things go around here? I'm not even going to tell you about the can of gel stain I may or may not have dropped on the new bathroom floor. The counter and sink are from Home Depot. We paid $218 for the sink and vanity. It is by Stone Effects and the color is Capri. It looks and even feels somewhat like granite, but it is not.  The faucet is also from Home Depot and was $80 (originally $160)  We added some simple knobs to the doors and called it a day!  That's all there is to it! If you have oak cabinets that you are thinking about updating, I highly recommend staining them this way. It was easy, inexpensive and the final product looks pretty good, in my opinion. If you have any questions, I am more than happy to answer them. I hope I inspired you to try something new! Linking up here:  |


